A tired staircase can drag down your whole home’s style, but a simple update can work wonders. Fresh finishes, new railings, or clever paint tricks can turn stairs into a standout feature—without the mess and expense of a full remodel.
Many homeowners feel stuck because stairs seem tough or pricey to upgrade. But smart updates are easier and more affordable than you might think. In this guide, you’ll find proven, budget-friendly ways to breathe new life into your staircase and completely change how your space feels.
Assessing Your Staircase and Setting a Vision
Giving your staircase a new look doesn’t start with power tools—it starts with fresh eyes and a clear plan. Take a few minutes to really study your stairs. This step will help you decide what to change and what you want the space to say about your home. Making these decisions upfront helps you avoid costly mistakes and keeps your project focused.
 Photo by Wolfgang Weiser
Take a Close Look at Safety and Structure
Before picking paint colors or new accessories, check the bones of your stairs. Look at the following:
- Handrails: Make sure they’re sturdy and easy to grip. A wobbly rail is a big safety risk.
- Treads & Risers: Each step should feel solid, with no squeaks or loose boards. All risers (the vertical part) and treads (the horizontal part) should be even and well secured.
- Surface Condition: Check for worn, slippery, or uneven spots. These can cause slips, so anti-slip strips or textured pads may help.
- Balusters and Guardrails: Spacing should be no more than 4 inches apart—just right to keep kids safe.
- Lighting: Good lighting isn’t just about looks. Shadows and dark spots can hide hazards.
Spotting any of these issues early is key. Fix or reinforce anything that feels off before you start your cosmetic updates.
Identify What Needs Updating
Once your stairs are safe and sound, it’s time to decide what you want to refresh. It’s okay to focus on one area if you want a simple update, or go broader for a bigger impact.
Common areas to consider:
- Railings: Swap old spindles for modern metal or glass, or repaint existing ones for a quick lift.
- Treads and Risers: Add stair runners, new paint, or wood overlays for a fresh surface.
- Wall Space: Hang artwork, family photos, or install new wall trim to frame the staircase.
- Lighting: Upgrade fixtures, add sconces, or try LED stair lights for both style and visibility.
Make a quick list of what feels outdated, broken, or just doesn’t fit your style anymore.
Gather Inspiration and Set Your Goal
It’s easy to jump straight in, but a little inspiration goes a long way. Think about what matches the rest of your house. Scroll Pinterest, flip through magazines, or check out before-and-after photos online to spark ideas.
When you’ve gathered some options, set a clear direction. Ask yourself:
- Do you want a staircase that blends in or stands out?
- Is your goal modern and sleek, traditional and classic, or something bold and unique?
Write down your style goal, like: “Bright and modern with clean lines”—or—“Warm farmhouse with rustic touches.” Having this vision in mind guides every choice, from paint color to new hardware.
With your plan in place, you’re ready to tackle your staircase update, one step at a time.
Easy Cosmetic Updates for a Fresh Look
Breathe new life into your staircase with a few well-chosen tweaks—no demolition required. The right cosmetic touches bring out character, hide flaws, and set the tone for the whole hallway or entry. Whether you crave crisp, modern lines or cozy warmth, these simple upgrades make your stairs pop without draining your energy or wallet.
Painting and Staining for Instant Transformation
Color is the easiest way to get a staircase looking sharp. Start by choosing paint and stain finishes made for high-traffic spots. Semi-gloss or satin paints are perfect for risers and stringers—they’re easy to wipe down and catch the light just right. If you’re painting wood stair treads, pick a specialty floor paint or a durable enamel like Rust-Oleum Interior Floor Coating. For a classic contrast, many homeowners love dark treads with white risers, but you can go bold with nearly any combo.
Best paint and stain tips:
- For treads: Look for floor paints or an interior floor coating in a semi-gloss finish. These resist scuffs and are easy to clean.
- For risers: Regular interior paint works if the surface is sound, but go with tougher paint if your stairs see heavy use.
- For handrails and balusters: Semi-gloss or satin gives a polished look and stands up to hands and cleaning sprays. Sherwin Williams Tricorn Black is a designer favorite for modern projects.
Prep Right for Lasting Results:
- Clean every surface completely.
- Sand rough spots smooth—start with 120-grit, finish with 220-grit.
- Fill any holes or gouges with wood filler, then sand again.
- Use painter’s tape to get clean lines—especially where treads meet risers.
- Prime if you’re painting bare wood or covering dark colors.
Paint every-other tread first so you can still use the stairs while waiting for paint to dry (plan for 24-72 hours between coats and before heavy use). This step-by-step approach creates a crisp, professional look with top-notch durability.
Installing Stair Runners for Texture and Comfort
A stair runner transforms any staircase instantly, adding color, comfort, and a subtle sense of luxury, even on a tight budget. Runners also boost safety by softening steps and reducing slips.
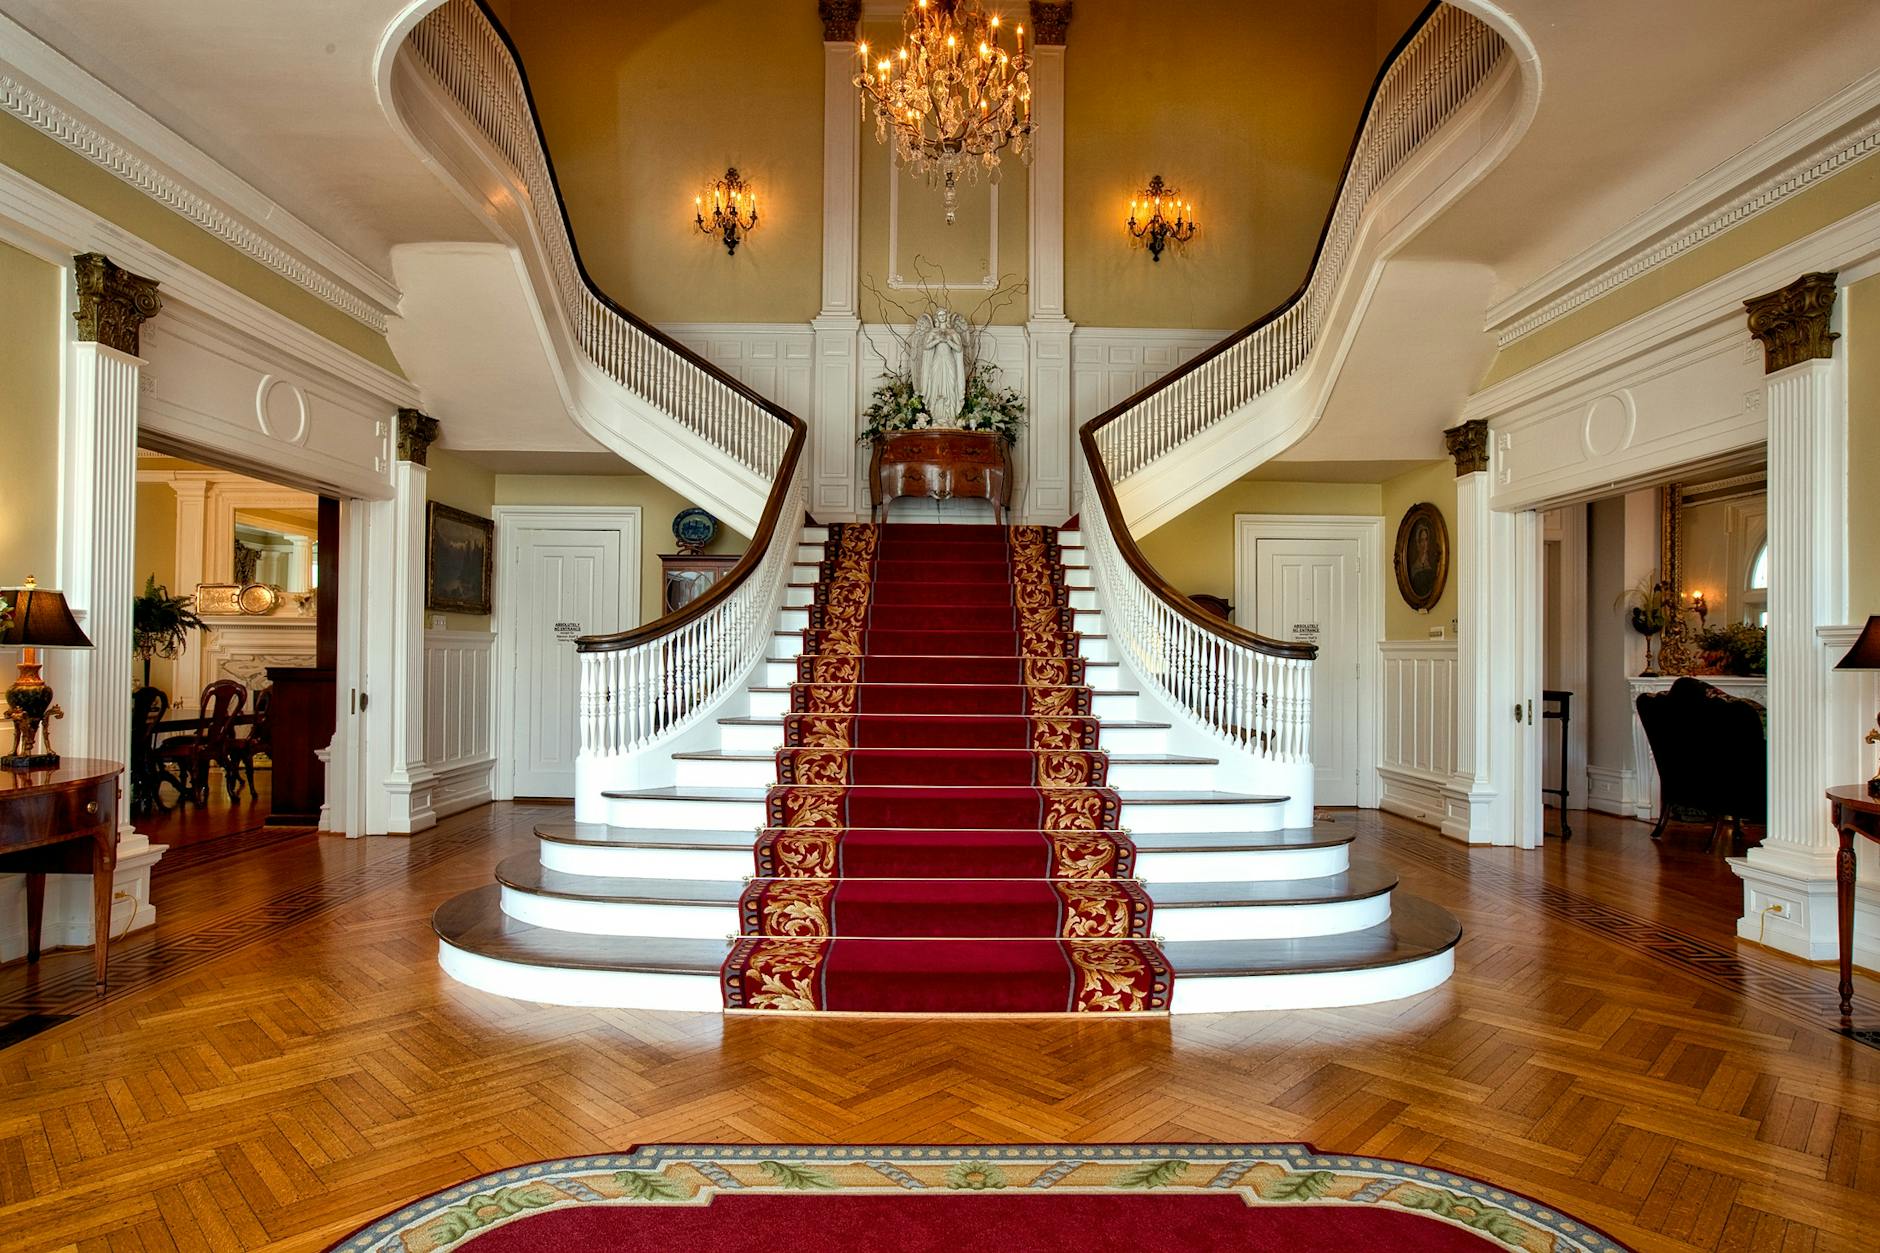 Photo by Pixabay
DIY installation is totally possible with just a bit of measuring and careful stapling. Here’s how to nail it:
- Measure your stairs (account for tread depth, riser height, and the curve of each nose).
- Choose non-slip rug pads for under each tread. This makes the runner last longer and feel cushy.
- Roll out the runner, centering it on each step. Use painter’s tape as a guide to keep things straight.
- Staple every 3 inches under the tread nose, using a bolster chisel or strong hands to keep the runner tight.
- If you’re joining multiple runners, overlap at the seam and secure with seam tape, making sure it’s smooth.
Best runner materials:
- Polypropylene (outdoor rug): Super affordable, tough, and comes in endless patterns.
- Wool: Feels luxurious, lasts forever, but is pricier.
- Natural fibers: Sisal, jute, and seagrass bring in texture and a relaxed vibe, but keep them dry as they can stain.
When picking a pattern or color, go for bold stripes for a modern look, traditional florals for classic homes, or choose a neutral if your walls are already colorful. Aim for about 27-32 inches wide so you get a pretty border of stairs peeking out.
Decorative Risers: Wallpaper, Tiles, and Patterns
If you like the idea of a statement staircase, don’t skip the risers. These often-overlooked spots are perfect for adding a splash of color or fun design.
Easy riser upgrades:
- Peel-and-stick wallpaper: Measure each riser separately and cut panels before smoothing them in place. Align patterns for seamless flow from step to step. Use a smoothing tool to zap air bubbles. For busy households, seal with a clear topcoat for extra durability.
- Paint: Go for an ombre fade, classic stripes, or alternate two colors for playful contrast. Use painter’s tape and stencils for the sharpest lines. Let paint dry completely before moving on to the next riser.
- Tile or decals: Tile adhesive sheets or vinyl decals work great for Mediterranean or geometric looks. Place carefully and make sure to trim edges for a custom fit.
Creative risers are like accessories for your staircase—add quotes, patterns, or even family names for a truly custom result. It only takes an hour or two and can make even the simplest stairs feel full of personality.
A little time and a few supplies can leave your stairs looking fresher than ever, while adding comfort, safety, and style right where you need it.
Upgrading Railings, Balusters, and Newel Posts
Swapping out or freshening up your stair rails, balusters, and newel posts can completely shift the vibe of your entryway or hallway. Instead of gutting your whole staircase, these focused upgrades let you get creative, modern, and even a little bold. You can choose between a classic style or something fresh and industrial, all while sticking to a budget and working at your own pace.
Swapping or Refinishing Handrails and Balusters
 Photo by Max Vakhtbovycn
Handrails and balusters set the tone for your stairs. Choosing wood or metal changes everything about the look and feel.
- Wood options: Great if you want warmth or desire a traditional look. Stain them dark for a luxe, timeless feel or paint them white for a crisp farmhouse statement.
- Metal spindles: These work perfectly for open, airy, modern spaces. Matte black or brushed nickel balusters match almost any wall color and bring instant polish.
Refinishing wood rails or balusters usually means sanding, then layering on a new stain or paint. For paint, use a high-quality trim enamel. Want to swap wood for metal? Many homeowners use iron baluster kits that fit standard rail holes—no need to tear down the whole staircase.
Steps for a new finish or replacement:
- Remove old balusters/handrails carefully with a reciprocating saw or hand tools.
- Sand smooth for repainting or staining.
- Prime and paint (or stain) before reinstalling balances neat edges with maximum durability.
- For metal, slide new balusters into place following the kit instructions, then glue or screw to secure.
Mixing wood and metal is a growing trend that helps bridge classic and modern design. If you love contrast, pair bright white wood with matte black spindles.
Easy DIY Baluster Installation
You don’t need to call a pro for a new set of balusters. Modern DIY kits make it all approachable—even for beginners.
One of the easiest routes is using a system like Tap N’ Twist baluster replacement kits. Here’s how a typical update flows:
- Remove your old spindles using a drill or hammer.
- Mark and drill holes for the new baluster’s pins (if not already there).
- Test-fit each baluster before securing.
- Use the adjustable connectors or epoxy (often included in kits) to lock each piece in place.
- Let any glue or adhesive set, and touch up edges with paint as needed.
These kits save time and keep dust down—perfect for a weekend project. Most come with step-by-step guides and the hardware you need. All you’ll need are some basic tools:
- Cordless drill
- Tape measure
- Pencil
- A level
Updating the balusters alone instantly lifts your whole staircase, especially if you lean into a new material or shape.
Modernizing Newel Posts on a Budget
Newel posts are the main supports at the foot and turns of your staircase, and modernizing them can redefine your whole stair’s look without much effort—or cost.
Budget-friendly updates include:
- Wrapping with MDF: Cut MDF panels to size, wrap them around your existing post, and fasten with adhesive or brad nails. Sand, prime, and paint for a thick, craftsman-like look.
- Paint: Sometimes all it takes is a bold or neutral coat of paint. Matte black, deep green, or even bright white can modernize instantly.
- Add trim: Use inexpensive square or decorative molding to create faux paneling or custom details.
Steps for a quick post makeover:
- Wipe the post clean.
- Attach MDF (if wrapping), and fill seams with caulk or wood filler.
- Attach trim in creative patterns (boxes, stripes, or craftsman grids).
- Sand lightly, prime, and paint with a tough trim enamel.
Updating your newel post finishes the transformation. This one change can mimic custom woodwork, producing a staircase that looks brand new for a fraction of the price.
Functional and Decorative Enhancements
The right updates add both style and practicality to your staircase without tearing everything out. Think of these changes as layering personality and smart solutions where you walk and what you see every day. With modern lighting, creative wall art, or clever storage, your staircase can become a highlight and a help in your home—all without major construction.
Adding or Upgrading Staircase Lighting: Explore battery-operated, motion-sensor LEDs and under-step lighting options for ambiance and safety
Staircase lighting does more than make a hallway brighter—it can create instant atmosphere and boost safety. Battery-operated, motion-sensor LED lights are a top pick if running wires seems daunting or you want a quick fix:
- Wireless LED stick-on lights work anywhere along steps or walls. Just peel, stick, and you’re done—no electrician needed.
- Motion-sensor models turn on automatically as you walk by, so you never have to fumble for switches at night.
- Under-step lighting kits offer a subtle glow that highlights the stair shape, making every step clear while adding a modern touch.
Many newer stair lights come in warm or adjustable colors and low outputs (1–20 lumens) that won’t blind you, but offer just enough to keep things safe. Look for models with adjustable timers and easy battery changes. If you’re after extra polish, high-end kits can be controlled via smartphone or voice command, and some even support programmable colors for cool effects or holiday decor.
Consider placing lights:
- On wall edges to highlight artwork or family photos
- Under each stair tread for a floating look
- Along the handrail for extra guidance
These small investments offer a huge return in both style and peace of mind.
Creative Wall Treatments and Art Displays: Using accent paint, statement wallpaper, gallery walls, or decorative molding to turn staircase walls into focal points
Staircase walls give you the perfect blank slate for adding personality. Breathe new life into this high-traffic zone with simple changes:
- Accent Paint: Choose a bold, contrasting tone for the stair wall, or add a geometric mural for modern drama. Even a painted stripe along the rise of the steps draws the eye upward.
- Statement Wallpaper: Peel-and-stick wallpaper in bold prints, textured grasscloth, or even faux brick creates instant impact without a big commitment.
- Gallery Walls: Frame family photos, kids’ artwork, or vintage prints. Arrange them in a grid for clean lines or play with sizes for a collected, eclectic look. For tall walls, go vertical or stagger frames up each step for a custom feel.
- Decorative Molding: Install simple box molding, picture frame trim, or even shiplap for texture and dimension. These upgrades add architectural interest, especially in older homes wanting a refresh.
Include art lights, sconces, or slim LED strips to make your art glow, especially for evening ambiance. Whether modern or classic, these wall treatments can turn a pass-through into a main event.
 Photo by Vintage Lenses
Incorporating Storage or Display Solutions: Ideas for under-stair drawers, built-in shelves, or open cubbies to keep the area clutter-free and beautiful
Unused space under your stairs can be a goldmine for storage or stylish displays. Make every inch count with a few creative upgrades:
- Under-stair drawers: Deep pull-out drawers can hide shoes, bags, sports gear, or off-season items, giving the entry or hallway instant tidiness.
- Built-in shelves or cabinets: Custom shelves work for everything from books and baskets to shoe cubbies or a mini mudroom bench. Closed doors keep things visually clean, while open shelves let you spotlight collectibles or plants.
- Open cubbies: Great for families, cubbies let each person claim a spot for shoes, backpacks, or hats. Add baskets to keep things organized, or use the shelves as a mini library or toy zone.
Other fun options:
- Tuck in a desk or compact home office if you need workspace.
- Set up a reading nook with cushions and a small light.
- Create a wine rack for the adventurous entertaining type.
By blending built-in storage and display, your staircase supports your daily life while making a style statement. The transformation is simple, practical, and lets you put a personal stamp on what’s often wasted space.
Best Materials and Finishes for Staircase Updates
A staircase upgrade doesn’t have to mean a full demo. You can transform the entire look and feel just by updating the materials and finishes. Choosing wisely goes beyond looks—think about durability, safety, ease of upkeep, and even the planet when making your picks. This approach keeps your project affordable while giving your staircase a real style boost.
Choosing Durable and Stylish Materials
With so many options out there, it’s easy to get overwhelmed. Focus on strong, affordable materials that blend well with your home’s vibe and will stand up to years of traffic.
- Bamboo: This material is having a real moment in eco-friendly design. Bamboo grows fast, is tough, and looks beautiful—think warmth and fine grain patterns. It’s more affordable than many hardwoods, resists warping, and stands up to daily scuffs. Perfect for treads or accents if you want something green that pops.
- Reclaimed Wood: Love the idea of adding character and cutting waste? Reclaimed wood lets you add unique, one-of-a-kind grain and a lived-in look. It’s wallet-friendly, good for the environment, and can often be found at local salvage yards or specialty dealers. Try it for stair treads or risers for that rustic warmth or modern farmhouse style.
- Engineered Wood: If you want real-wood looks without the high cost or maintenance, engineered wood is your friend. The layered structure keeps it stable—even if your home gets humid or dry—and it can be sanded and refinished several times.
- Steel or Powder-Coated Metal: For those craving modern vibes, consider steel or powder-coated metal for railings, balusters, or even open risers. This is sturdy, sleek, and low-care. Matte black or custom powder coating can match any paint or style.
Other eco-friendly options that can work, especially in creative combos:
- Recycled Metal: Use for accent rails or brackets to bump up the industrial feel.
- Cork or Rubberwood: Both are sustainable and cushiony for comfort, though less common for treads.
- Glass (tempered or laminated): Great for balustrades if you want light to flow, but keep in mind it needs regular cleaning and is best for low-traffic homes.
The secret is mixing materials—maybe bamboo treads with steel balusters, or reclaimed oak paired with crisp white paint. This kind of blend gives your staircase extra personality and helps it fit naturally with the rest of your space.
Tips for Long-Lasting Finishes
You’ve picked strong materials—now protect your handiwork with tough, attractive finishes. Good finishes help resist scratches, stains, and wear so your update stays fresh for years.
- Polyurethane: One of the best go-tos for wood treads and rails. Water-based polyurethane dries fast, has low odor, and resists yellowing. Oil-based lasts a bit longer and offers a touch more warmth but has a stronger smell. Apply several thin coats for a tough, wipeable finish.
- Powder Coating: If you’re updating metal, powder coating beats paint for durability. It’s applied electrostatically and baked on, forming a super-tough barrier that stands up to nicks and scuffs—a smart choice for handrails or spindles.
- Non-Slip Paint: Safety matters most. Use stair and floor paint with a non-slip additive, or buy anti-slip stair paint that goes on textured. This keeps feet steady and the finish looking sharp, even in busy homes.
- Sealants for Eco Materials: For cork, bamboo, or engineered products, use manufacturer-recommended sealers. Most finishes for these materials are low-VOC, keeping air quality healthy.
- Stain or Tint: You can update the tone of wood with stain before sealing. Choose a color that pairs well with the rest of your home. After staining, always seal for protection.
Helpful techniques for best results:
- Sand lightly between finish coats for ultra-smooth surfaces.
- Use painter’s tape for crisp lines where materials or colors meet.
- Add felt pads under a runner or on the bottom of railings when installing to protect finishes.
Regular cleaning with gentle soap and a soft cloth will help your new finishes hold up. With the right combination of materials and professional-grade finishes, your staircase update will look good—and last.
 Photo by Waldemar
Conclusion
Small changes can completely shift the look and feel of your staircase. It doesn’t take a big budget or a contractor to get results that impress—whether it’s fresh paint, a new runner, updated railings, or smart lighting. Even one or two well-chosen updates can help your stairs blend in or stand out, adding value and personality to your home.
Anyone can make these improvements with a plan and a free weekend. Don’t let old or worn stairs hold back your space. Ready to make your staircase something you love seeing every day? Try one project and see how much it can transform your entryway.
Thanks for reading! Share your staircase updates or ideas in the comments—your project could inspire someone else to take the first step.

